How to get a set of OAuth 2.0 credentials on Google
In this article, we’ll guide you through the process of obtaining a set of OAuth 2.0 credentials (Client ID and Client Secret) on Google using the Google API Console. These credentials are necessary when integrating Google services, such as Gmail, with your web applications.
To complement the instructions provided here, we recommend watching the following video walkthrough for a visual guide. Although the video primarily demonstrates connecting a mailer plugin to Gmail using OAuth, the steps outlined are highly relevant and informative for the purpose of this article. The video serves as a visual aid to supplement the written instructions, making it easier to follow along and successfully obtain your OAuth 2.0 credentials.
Step 1: Access the Google API Console
Visit the ![]() Google API Console. You may be prompted to sign in to your Gmail account.
Google API Console. You may be prompted to sign in to your Gmail account.
Step 2: Create or Choose a Project
If this is your first time accessing this page, select Create a project and click Continue. Otherwise, select a previous project from the “Select a project” dropdown list.
Have a WordPress email problem right now? Ask us about it.
We’ll attempt to publish a solution ASAP for free. Challenge us!
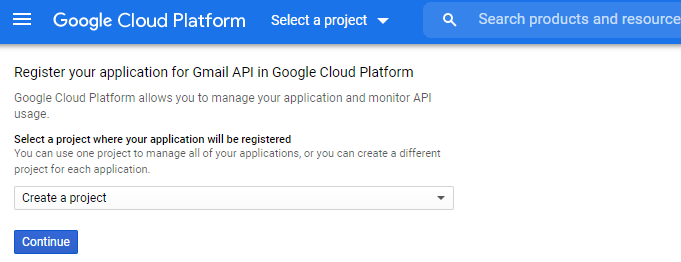
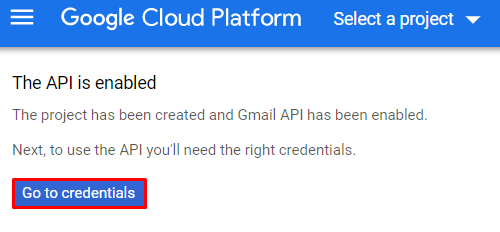
Next, click Go to credentials.
Step 3: Create Credential Type
Under “Credential Type”, select Gmail API for the “Which API are you using” question. For “What data will you be accessing”, select User data. Click NEXT.
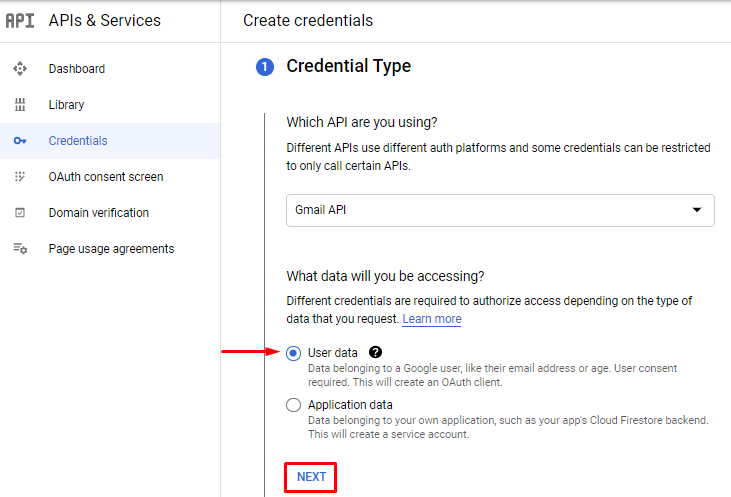
Step 4: Provide App Information
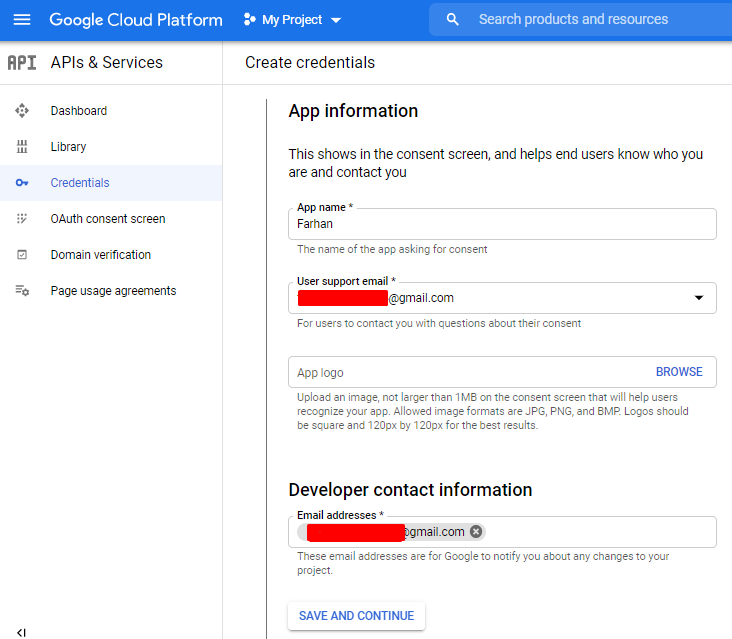
On the next screen, provide the following information:
- App Name – This is a free-form text field. Insert something like Gmail for WP.
- User Support Email – Enter your email address.
- Developer Email Address – Enter your email address.
Click SAVE AND CONTINUE.
Step 5: Skip Scopes (Optional)
Skip the “Scopes” step, as it is optional.
Step 6: Configure OAuth Client ID
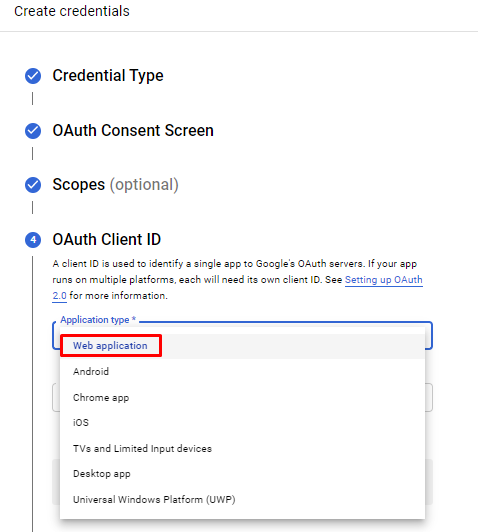
For item 4, “OAuth Client ID”, select Web application as the “Application Type”.
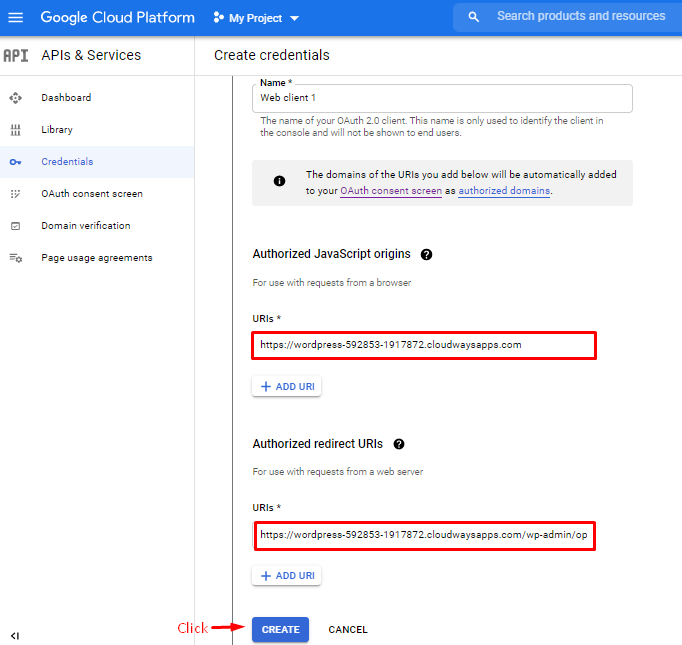
Scroll down the screen and click ADD URI. For both Authorized JavaScript Origins URI and Authorized Redirect URI, insert the address of your WordPress website (e.g., https://mylovelyshop.com). Click Create.
Step 7: Access Your Credentials
Click the credentials page link that appears.
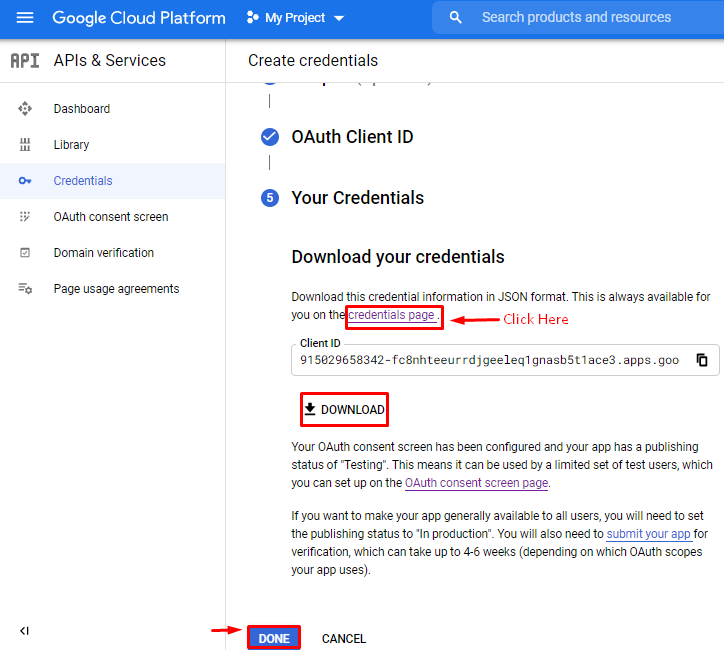
Step 8: Collect Your Credentials
Copy the Client ID and Client Secret for future use. You can always return to the Credentials screen to find these credentials, as they do not get deleted.
