The WordPress Email Authority
WordPress Email-Related Plugins
WordPress plugins that touch outbound email: SMTP mailers (WP Mail SMTP, FluentSMTP, Post SMTP), logging utilities, OAuth helpers, and the form plugins whose mail behaviour matters. Each review covers what the plugin does at the wp_mail layer, how the freemium tier compares to paid, and what breaks when it’s deactivated.
-
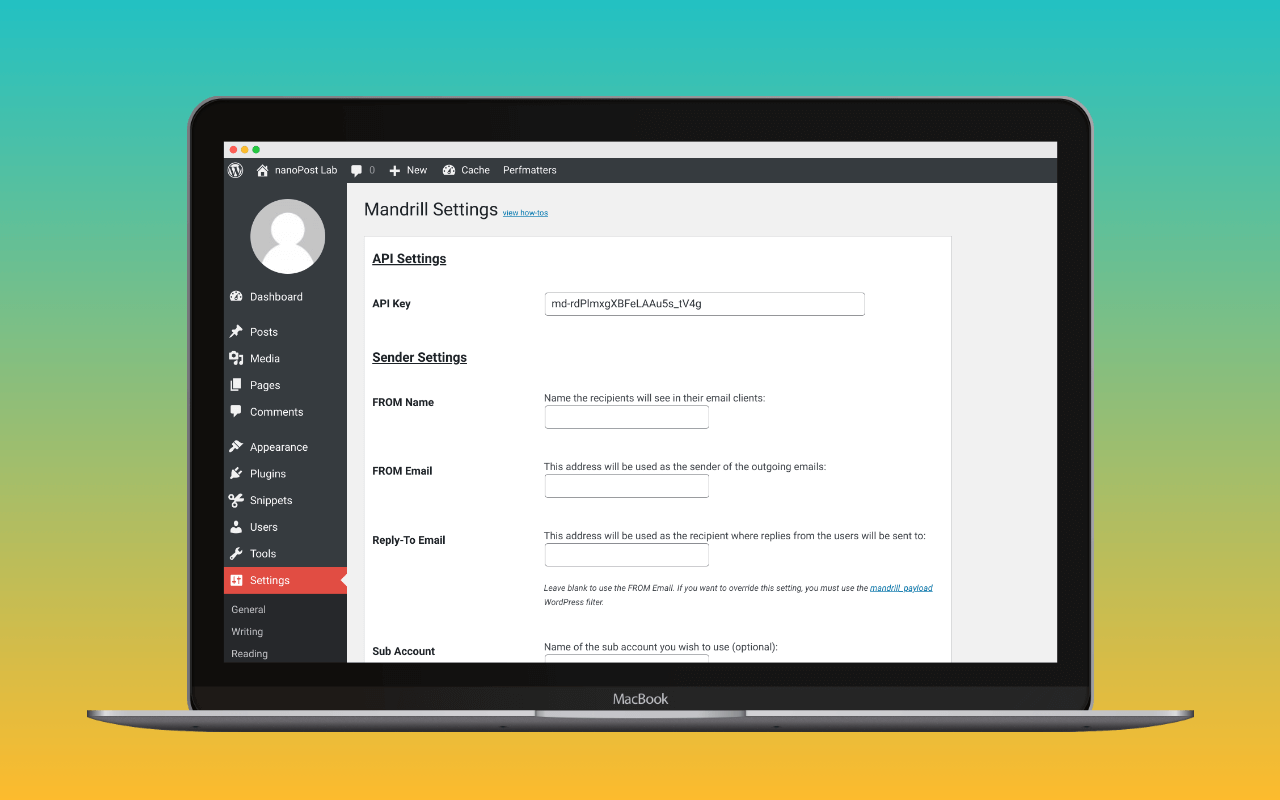
Send Emails with Mandrill: WordPress plugin review
Read More: Send Emails with Mandrill: WordPress plugin reviewSingle-provider WordPress mailer for Mailchimp Transactional. Worth installing only when its three Mandrill-specific hooks earn the install over generic SMTP.
-
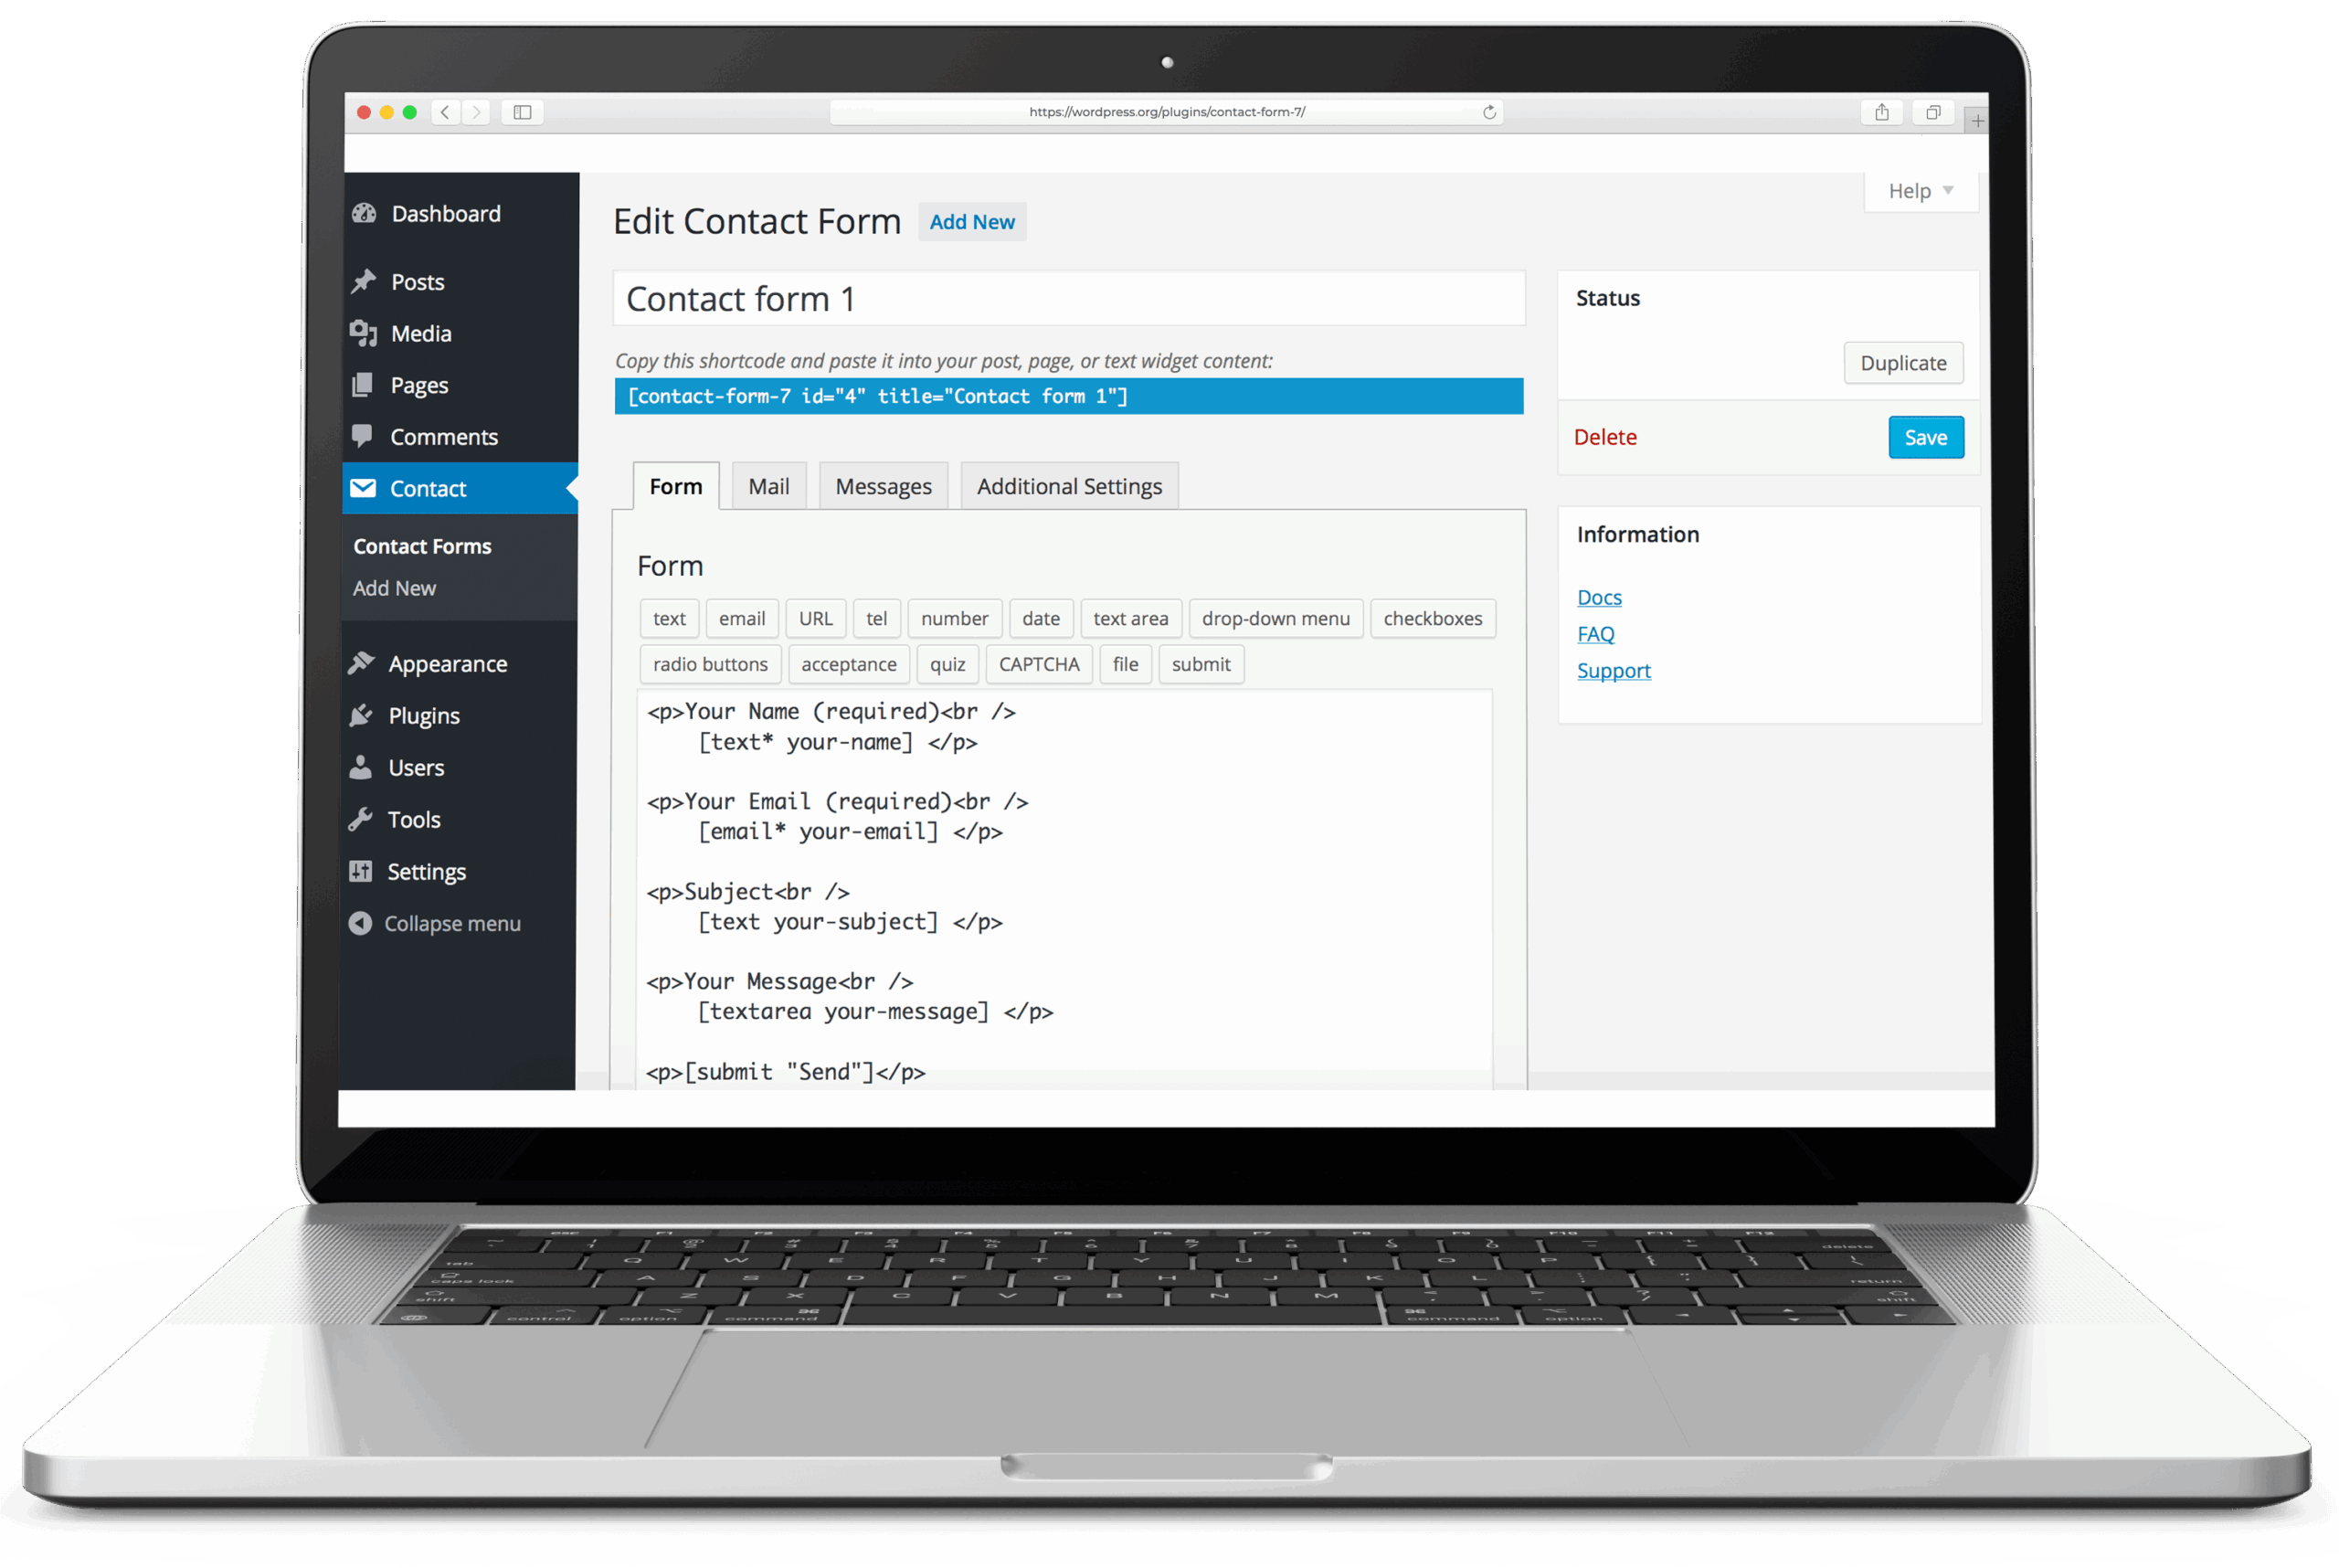
Contact Form 7 review
Contact Form 7 uses wp_mail(), so any mailer plugin routes its submissions automatically. Free, no Pro tier, add-ons fill the rest.
-
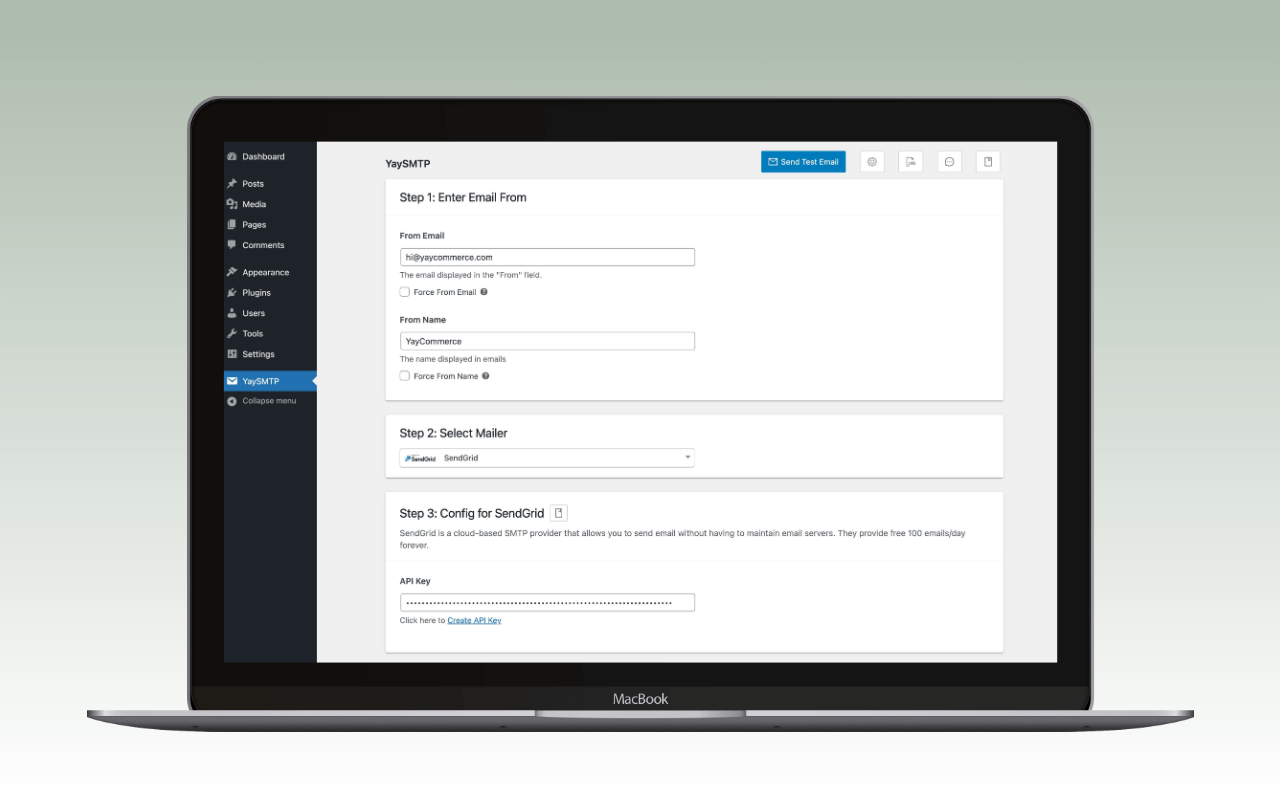
YaySMTP (by Yay Commerce) review
YaySMTP review — mailer plugin by Yay Commerce; free version includes Amazon SES, Outlook OAuth, and email tracking; Pro tier adds priority support only.
-
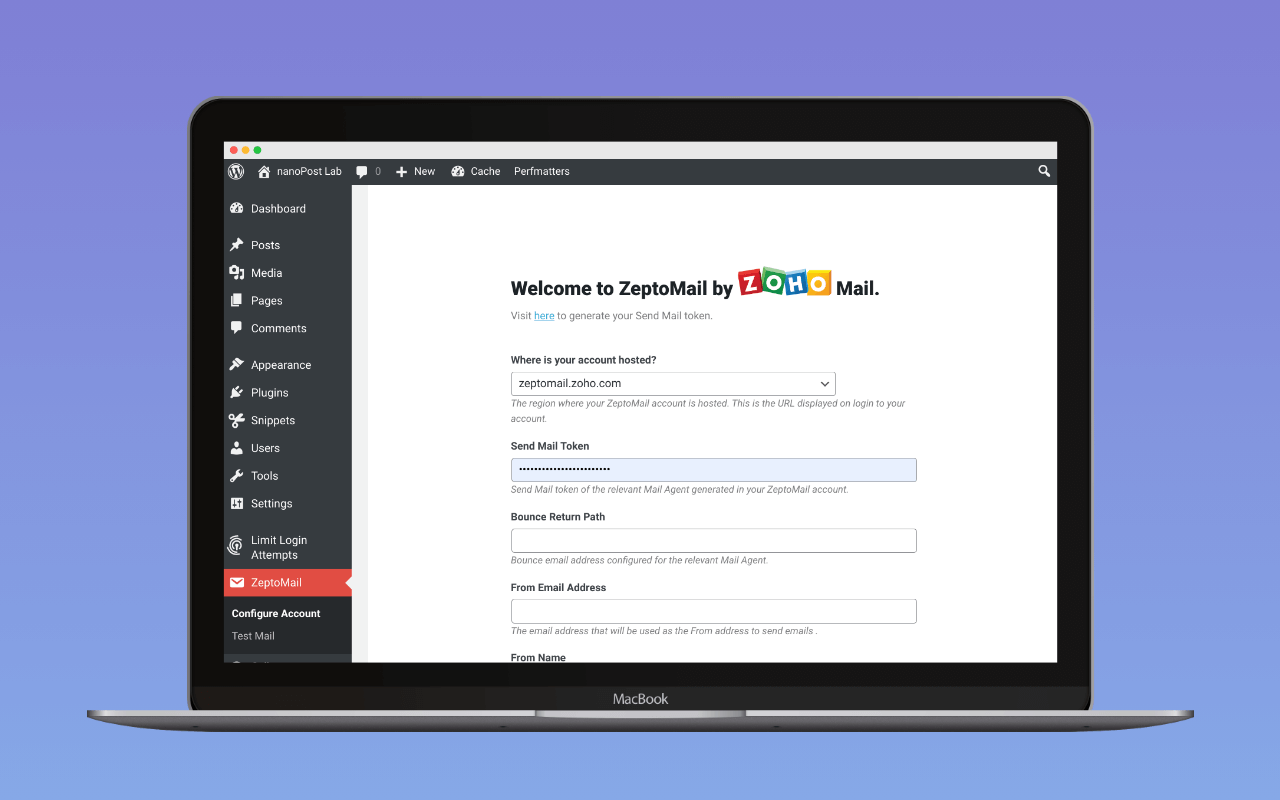
Zoho ZeptoMail plugin review
Zoho’s official WordPress plugin for Zeptomail (formerly TransMail). API-based, multi-agent routing, failed-email log, retry, test send. No Pro tier.
-

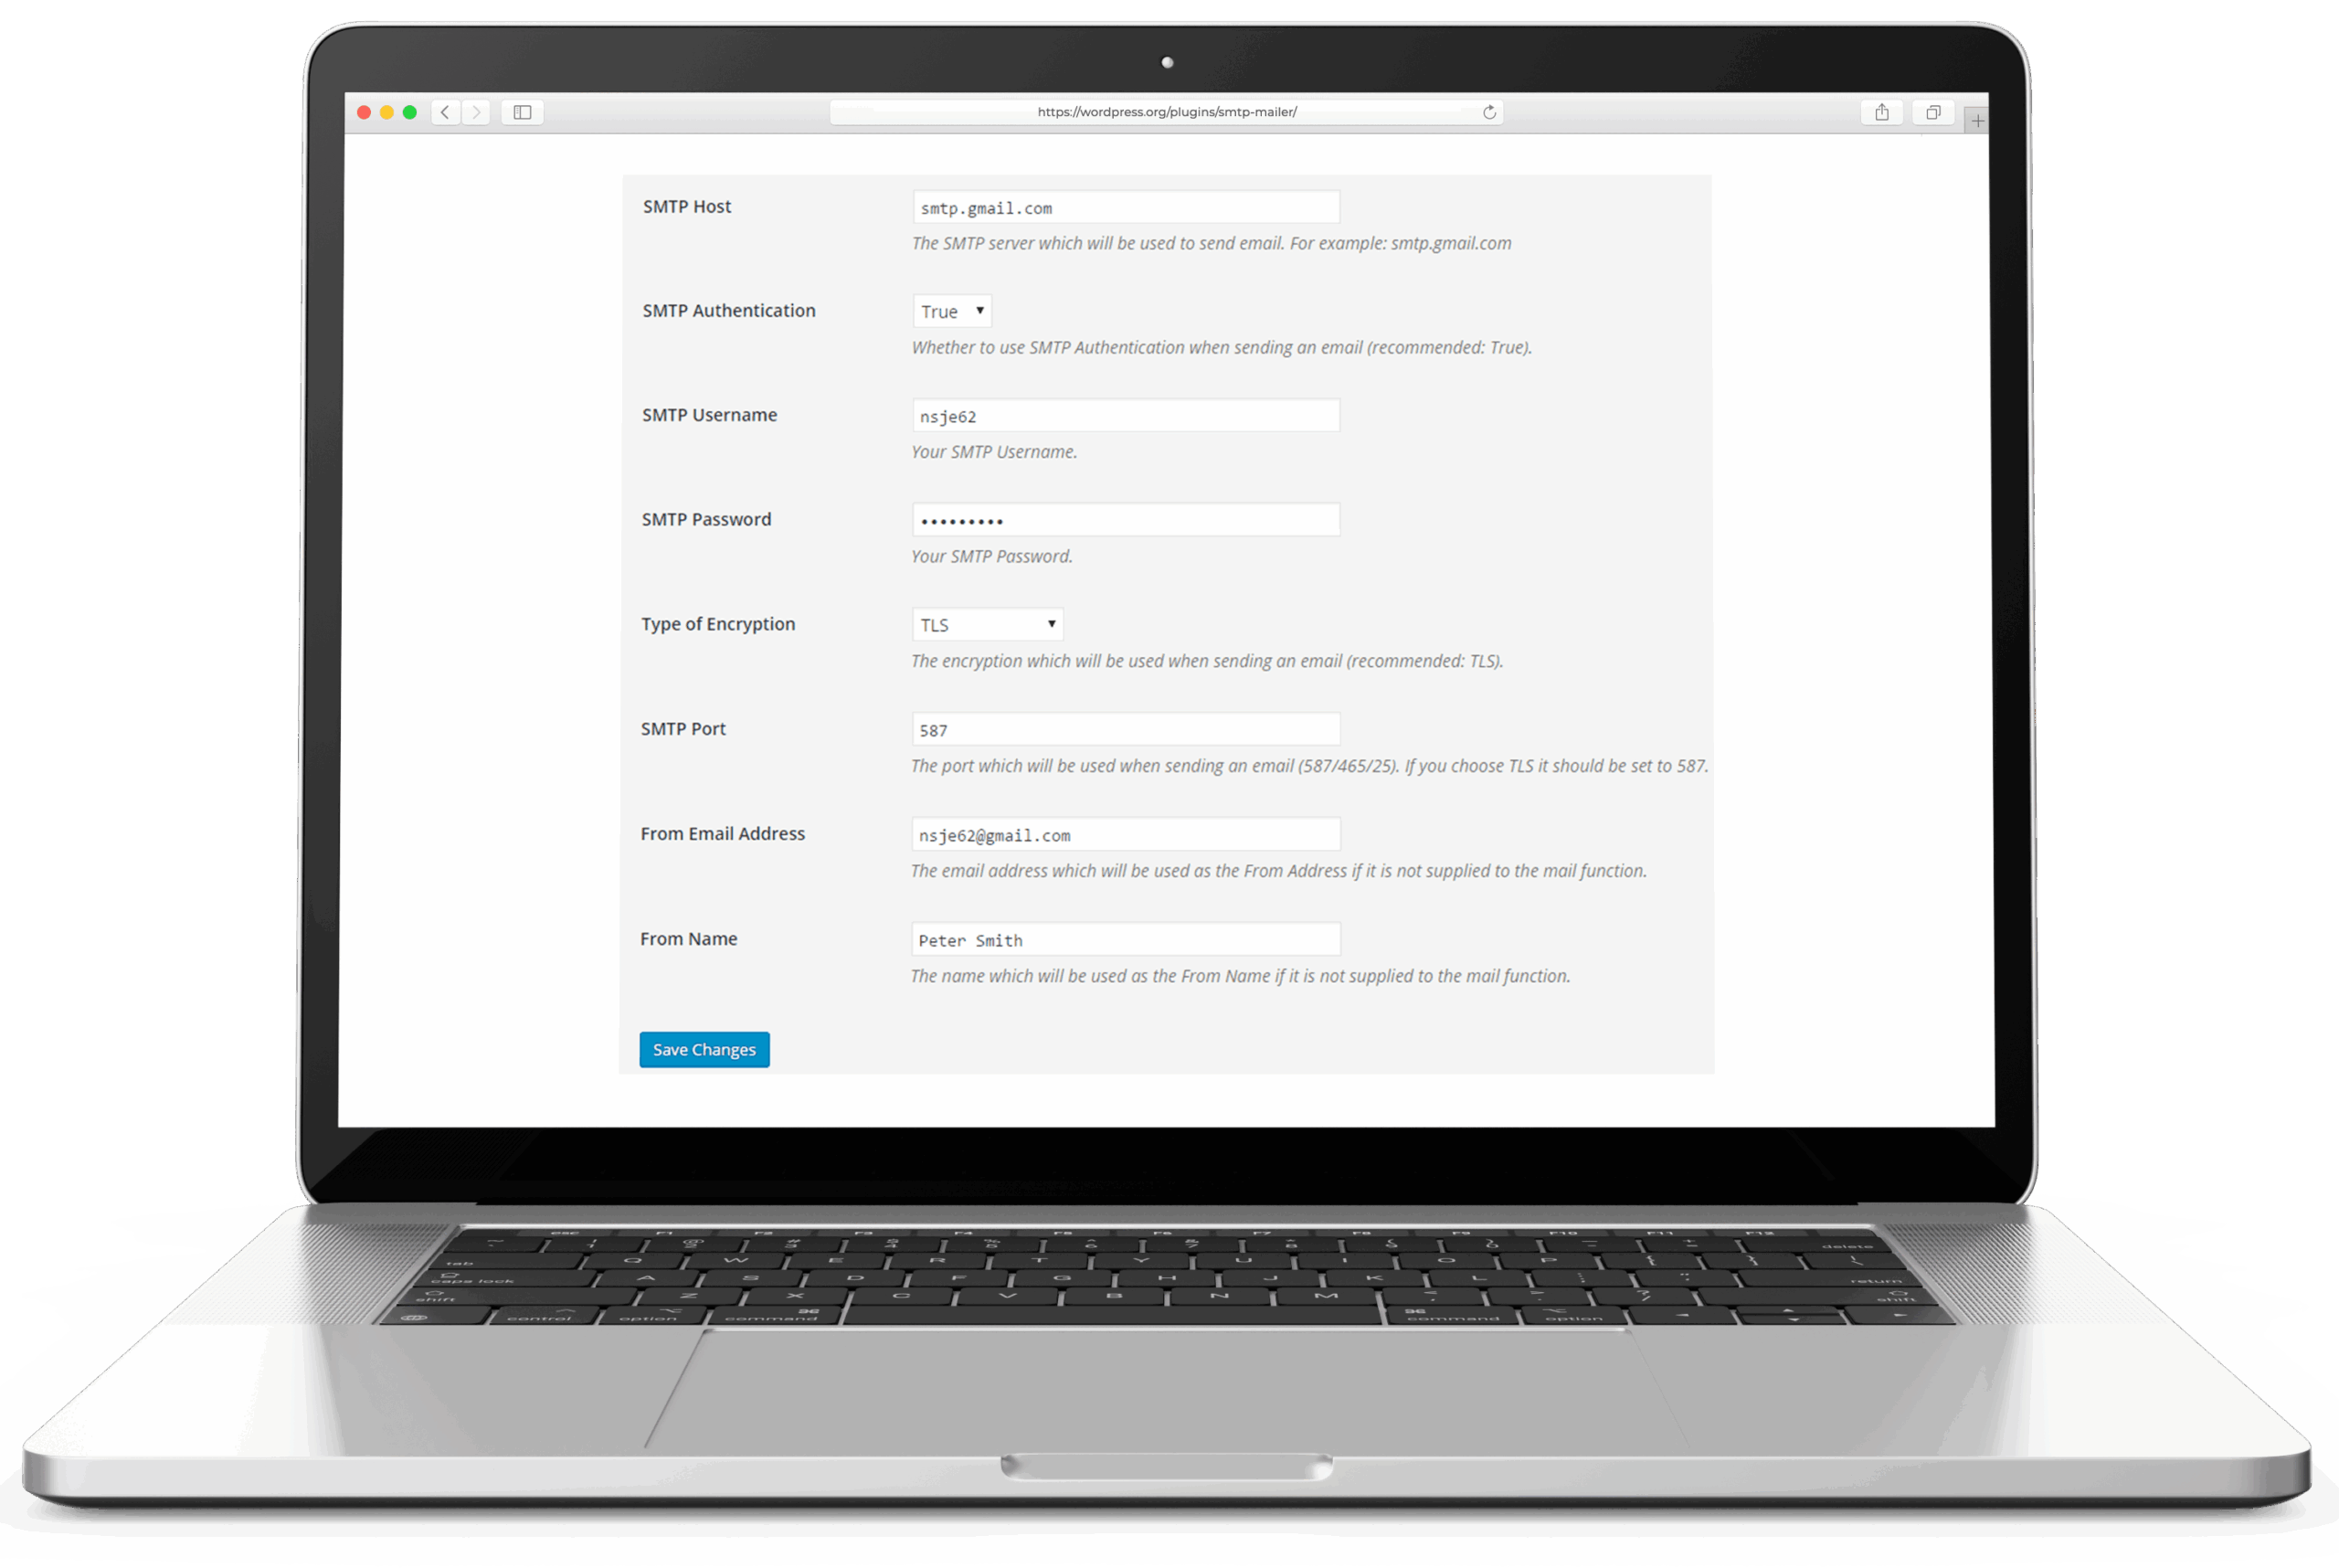
SMTP Mailer review
SMTP Mailer connects WordPress to any SMTP server using credentials you supply. 70,000+ active installs, free core, SMTP session log on test sends.
-
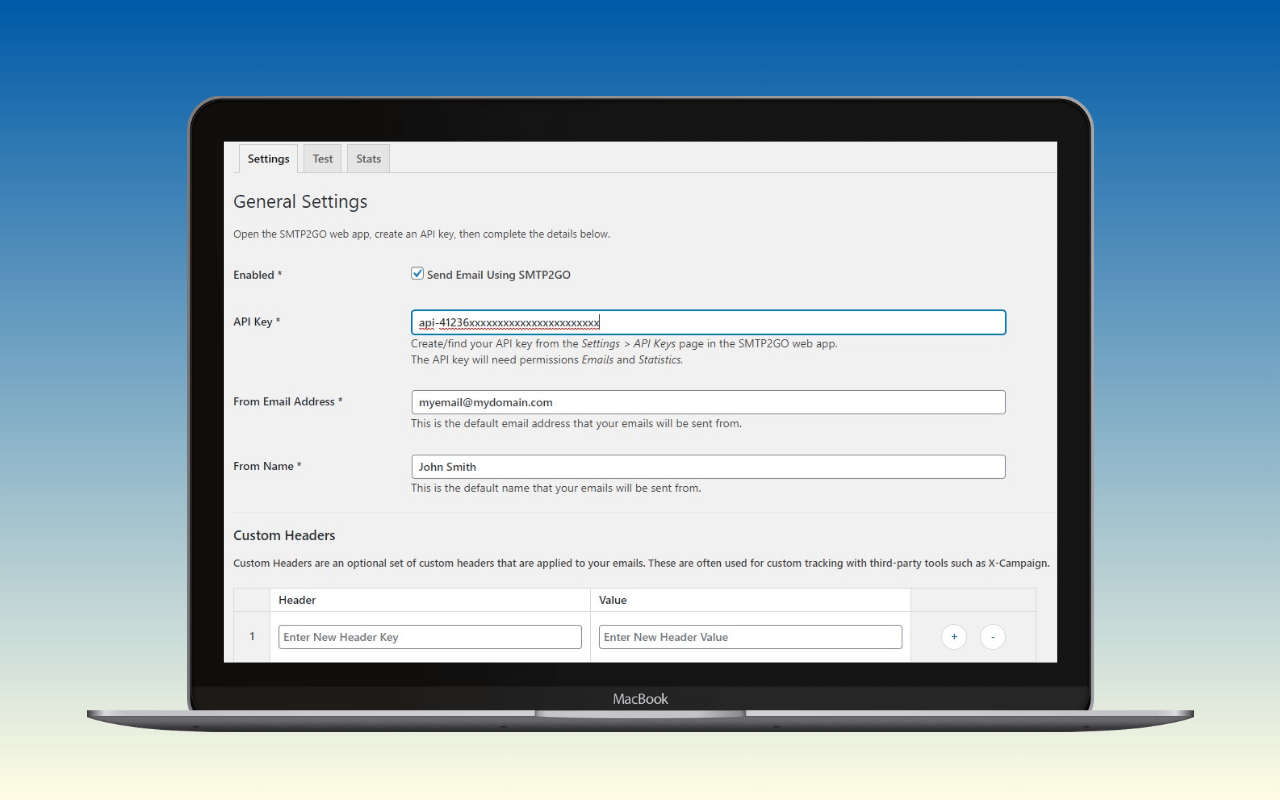
SMTP2GO plugin review
SMTP2GO’s official WordPress plugin routes wp_mail() through the SMTP2GO API. Single-provider, no logging, no fallback. The right pick when SMTP2GO is decided.
-
Post SMTP review
Post SMTP is the WordPress mailer plugin that pushes failed-send alerts to a mobile app. Logging, OAuth, and a fallback SMTP connection ship in the free version.
-

FluentSMTP review
FluentSMTP is the open-source WordPress mailer plugin from WPManageNinja. Logging, multiple connections, fallback, and OAuth, all in the free version.
-
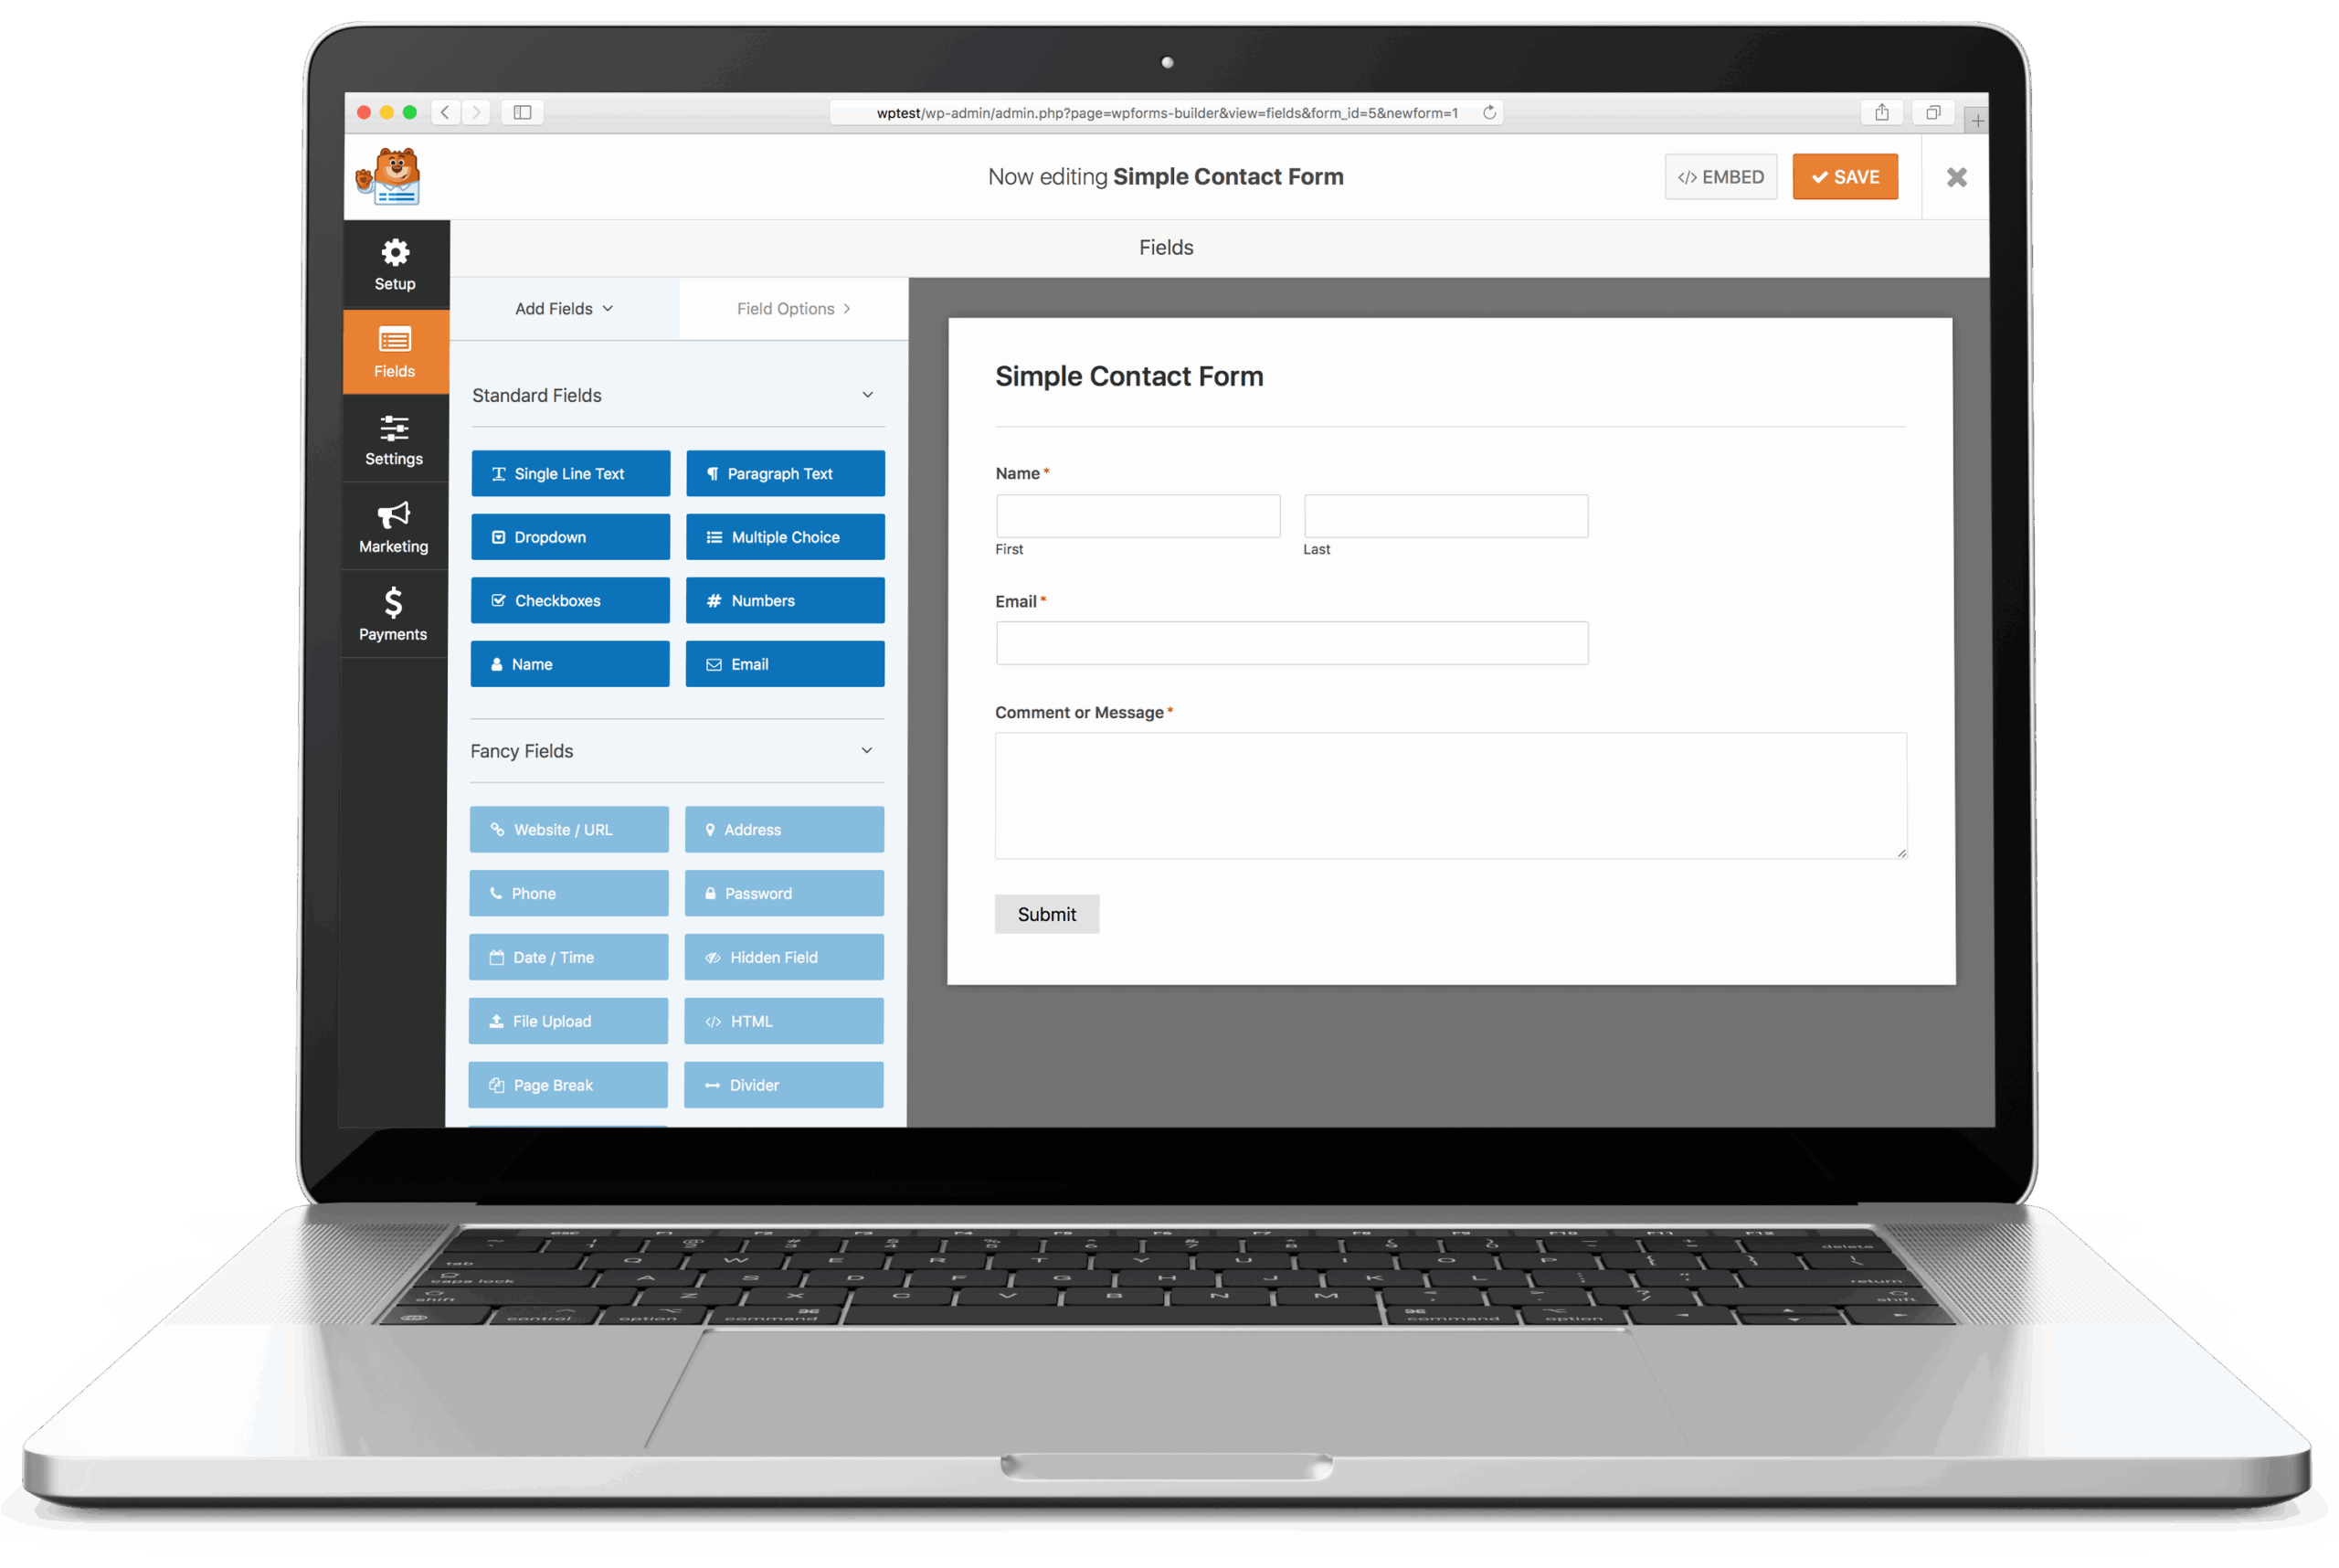
WPForms Lite review
WPForms Lite is a free drag-and-drop form builder for WordPress. No local entry storage, no conditional logic, and most integrations require a paid plan from $49.50/year.
-

Easy WP SMTP (by SendLayer) review
Easy WP SMTP is the smaller of Awesome Motive’s two mailer plugins (500K+ installs). Free version covers most setups; full email logging is Pro.
-
WP Test Email Review
Free WordPress test-send and 30-day email log utility. Smaller and simpler than Check & Log Email; the minimum-config alternative when richer logs are not needed.
-
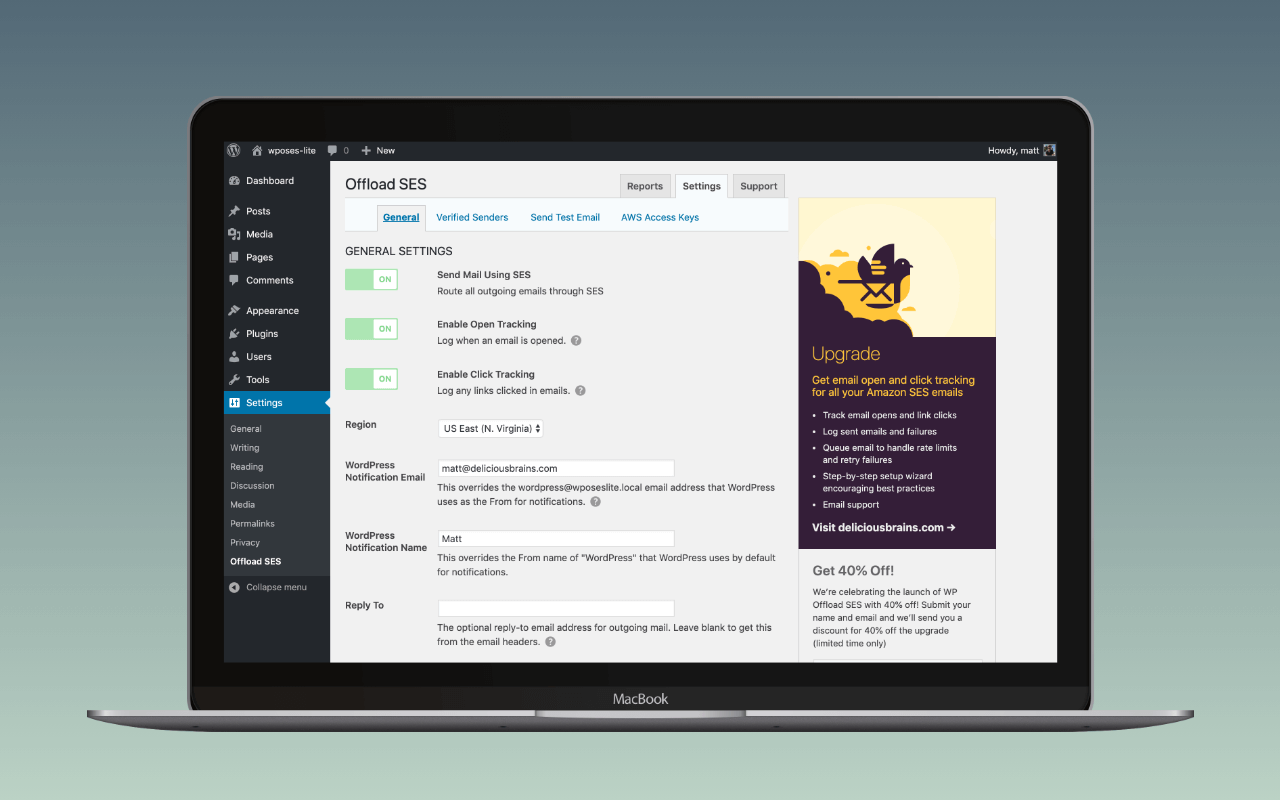
WP Offload SES review
WP Offload SES is the SES-only WordPress mailer. Domain verification, send-rate stats, and weekly health reports in the WordPress admin.
-

WP Mail SMTP Review
The most-installed WordPress mailer plugin (4M+ sites). Broad mailer support and a setup wizard that works. Email logging requires the Pro plan ($99/year on renewal).
-
SMTP Mailing Queue WordPress plugin review
SMTP Mailing Queue replaced pluggable wp_mail and queued mail to JSON files on disk. Closed by author request on 2024-10-09; no longer on wp.org.
-
Mail Queue WordPress plugin review
Mail Queue by WDM queues WordPress email via the pre_wp_mail hook, leaving SMTP plugins untouched. Actively maintained: v1.5.1, tested up to WordPress 7.0.
-

MailHawk plugin review
MailHawk is the WordPress plugin for the MailHawk sending service. Single-vendor by design, with in-admin DNS, logs, bounce handling, and account binding.
-
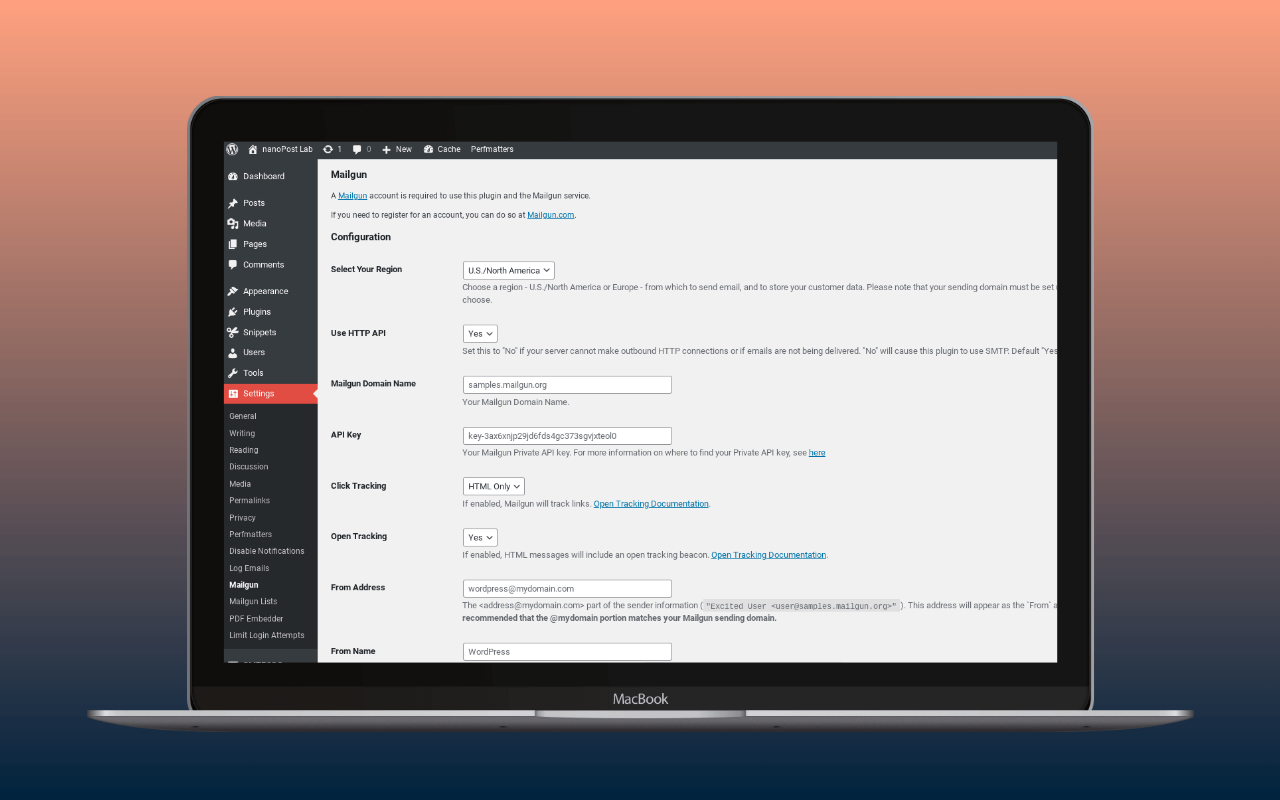
Mailgun for WordPress Review
Mailgun’s official WordPress plugin routes wp_mail() through Mailgun’s API over HTTPS, bypassing host SMTP port blocks. Free plugin, no permanent free tier.
-
Log Emails Review
Free WordPress email logger that hooks phpmailer_init. The right pairing with Disable Emails on staging; second to Check & Log Email on production.
-

Gmail SMTP by naa986 Review
Free WordPress mailer for Gmail using XOAuth2 over SMTP. Works in 2026 — but requires a specific Cloud Console step to avoid the 7-day token expiry trap.
-
GD Mail Queue Review
Queue-based wp_mail interceptor by Milan Petrovic. Capable architecture and the deepest logging panel in the category. Eighteen months without a release.
-
Check & Log Email Review
Free WordPress email logger that hooks wp_mail independently of the mailer. The standalone choice when the sending plugin works and logging is missing.
-
Disable Emails Review
Pluggable wp_mail() replacement that silences WordPress notifications on staging, dev, and freshly imported sites. Not a permanent outbound off-switch.